Showing posts with label home. Show all posts

Sunday, March 4, 2012

Sunday Crafts: Melted Crayon Art

Preview:
I absolutely LOVE Sundays.  Why so?  Well, for one, I don't have to go into lab (most of the time) to check on my cells and it's usually my day of relaxation.  Recently, my only obligations seem to be my morning long run.  I fueled up with pb toast and bananas and headed out for a 12-miler on what just happened to be a gorgeous day in San Diego.  It actually got into the 80s today, but luckily I finished by run when it was only in the low 70s.  Warm, but beautiful.  I was also feeling good because this was my last long run before the half marathon next weekend!  I scoped out a majority of the course and besides a gradual hill from mile 8-10, the rest of the course is flat and the last 2+ miles are downhill!  (today's run, 12 miles: 9:56 min/mi 1:59:14; took it pretty easy, but legs feeling refreshed)
View on my run, via Instagram
Onto the important things!  Sundays are also great because I have time to do things I normally don't: CRAFTS.  If you're currently breathing and especially if you're a girl then, more likely than not, you've heard of Pinterest.  A lot of my crafting inspiration comes from Pinterest and one of my favorite finds is melted crayon art.  My favorite ones I've seen are one using blues and grays to look like rain and another using greens and yellows to look like grass and then with flowers added for embellishments.  There are many other ideas and color schemes, but I chose to replicate those ones.

Supplies:
2 boxes 64-count Crayola crayons
2 canvases (I used 11 x 17)
Hot glue gun
Hairdryer
Newspaper or something to cover floor/wall
Black marker/paint
Floral embellishments

Directions:
  • Get your supplies together
 
  • Choose your colors and set them up in your chosen pattern.  Optional:  Stencil on a picture you like with permanent marker or paint.
  • Use hot glue gun to glue down crayons.  My personal preference is having all the crayons symmetrical with the "crayola" side showing.

  • Let crayons dry for ~20 min. to make sure they're firmly glued to the canvas.  In the meantime, grab your favorite beverage and drink up!
White wine for me on a nice sunny day.  You can bet I bought the wine purely for the name and label
  • Set canvases up against a wall with something covering the floors and wall in case wax spashes.
  • If you drew or painted something on the canvas, make sure to cover it with masking tape.
  • Plug in hairdryer and put on high setting.  Crayons may begin to melt at different rates and you may want to focus the heat on certain area more than others.  Play around with the settings and movement of the hairdryer to get the crayons to melt the way you want it to.  It may not be perfect, but that's the beauty of this art.
  • I let the crayon melt further down the canvas on the "rain" one and made the crayons melt together more.  I wanted the "grass" one to look more individual, like stems, and still have room to put flowers.
  • Turn the "grass" canvas over and apply flower embellishments

    Overall it can be a little time consuming, but it's the perfect craft for a free day.  Can't wait to hang them up!

Sunday, November 20, 2011

Home Team Pride

If you really know Shaun and I then you know we both love baseball.  What makes this a little more interesting is that our respective love is for rival teams.  I bleed Dodger Blue and Shaun is a Giant's fan.  There has been some name calling here and there but, overall, we've made it work.  In fact one of the only times we fight is when our teams play one another.

When we moved in together, I struggled with how I would decorate and somehow incorporate our love for our teams without seeming too one-sided.  I've already not so discreetly out my Ethier bobblehead on our bookshelf and I'm not sure how much more he could take.

Naturally and idea came to be while surfing the interwebs, mostly Etsy and Pinterest.  Those prints of hometown pride/ "home is where the heart is" are all the rage.
http://www.etsy.com/shop/LilyGene?ref=seller_info
What if I could make something similar that included our love for our teams?  I'm not super computer savvy, so I was slightly intimidated.  However, this was as simple as using PowerPoint -- found an outline of California, filled in background with selected color, add text and shape. Ta-da!


I printed out our pictures and bought some fairly cheap frames from Kohls and there you have it!  I decided to surround the two larger 8x10 pictures with five 4x6 pictures of us at both ballparks.  I pretty happy with the results because it's not too easy to blend nice design and sports without looking a little crazy.  But hey, we're both a little crazy for our teams.

What do you think?

Monday, January 17, 2011

Cookies in A Jar

Okay, okay, you can officially call me the. worst. blogger. ever.  I'm pretty sure it has been over a month since I've updated this thing and I truly do apologize.  I guess I just got caught up in the holiday hoopla, but that's really no excuse.

New Years Resolution: Create more, be it food or crafts.  Find inspiration in my everyday life.  Blog about it!

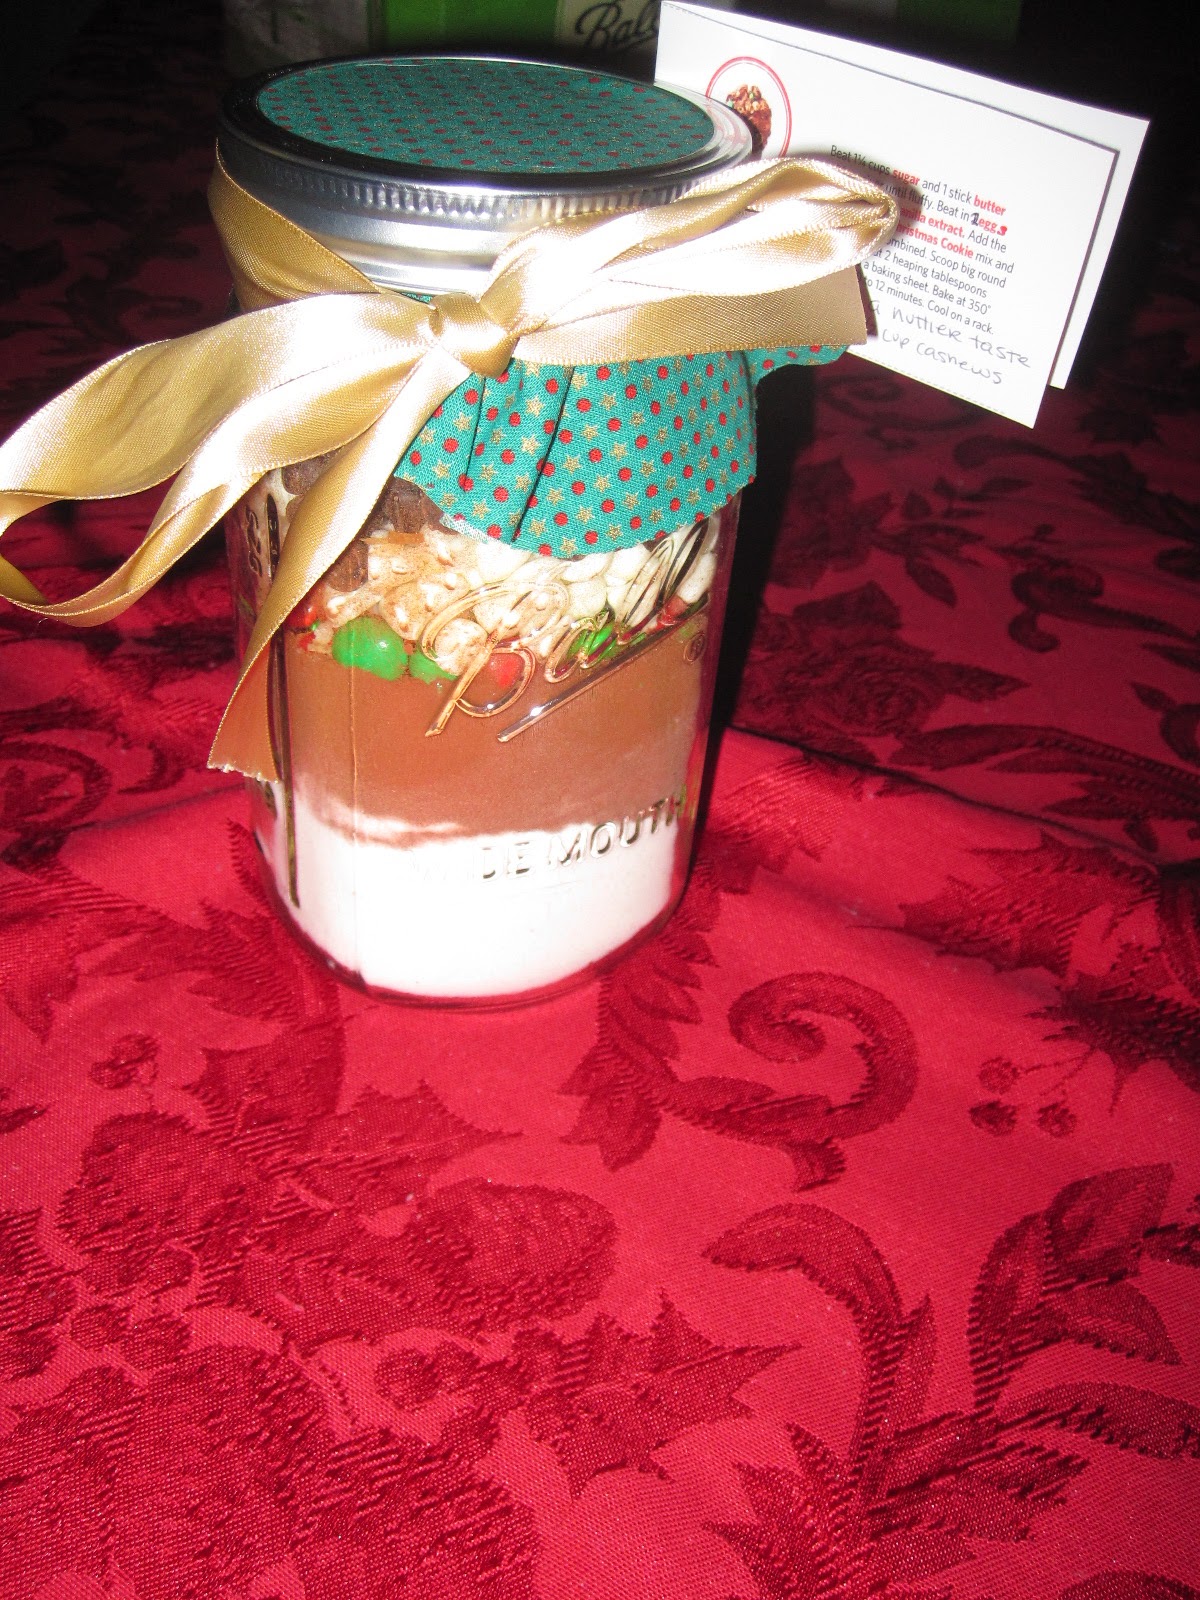
Speaking of the holidays, I would like to share with you one of the homemade edible gifts I made for some friends and family thanks to some recipe inspiration from Food Network (where else would I turn?)  I slightly adapted these Super Chunky Christmas Cookies and put all the ingredients in a 1 quart mason jar.  I consider cookies, or any treat, in a jar a great gift because the creator gets to express their creativity in decorating the jars, making recipe tags, etc.  Plus, the recipient still gets to mix and add a few more ingredients, having a little fun themselves!  These gifts in a jar don't need to just be limited to  Christmas-time, maybe find a fun recipe for Valentine's day (brownies with pink and red chocolate candies?), St. Patty's day (something green? just add beer?)...okay, you get the picture.  The possibilities are endless.  Bonus: When you're done, use the mason jar as creative storage or decor.  I'm using a jar to have all my makeup brushes in one place.

Super Chunky Christmas Cookie Mix
1 cup toasted shredded coconut* (toast your coconut before putting in the jars)
1 cup semisweet chocolate chunks (or chips)*
1 cup white chocolate chips*
3/4 cup red and green M&Ms*
1/2 cup Dutch process cocoa powder
1 1/2 cup all purpose flour
3/4 tsp. salt
* My measurements were near these amounts, but may have been slightly less because of the jars size, just use your best judgment.
**Add 1/2 cup chopped cashews if desired (I excluded these because my jars were smaller than the 1.5 liter jars that were suggested and also because not everyone likes nuts...plus they are just as tasty without :) But on the directions tag, I did say to add if desired. )

The ingredients.
The Maker simply puts these ingredients layer by layer into the jar.  I started with the salt on the bottom, flour, cocoa powder, M&Ms, chocolate chips, and coconut at the top.  Seal and decorate. Simple as that.  I cut circles out of holiday patterned fabric that were large enough to cover the lid, added some ribbon, and a recipe tag (I cheated, got mine from the food network site, sorry) and that was that!

Now, before I gave these as gifts to people I did have to try these for myself.  In making my sample batch I decided that it definitely needed another egg (they only use 1 in the directions) because they were too dry, even without the nuts.  With that minor adjustment, they turned out just right!
Cookies, pre-baking

Some of the jars, pre-ribbon and tag.  Side note: Used two different brands of cocoa powder, as you can see by the color differentiation.
Directions Tag:  Beat 1 1/4 cups sugar and 1 stick butter and mix until light and fluffy.  Add in 2 eggs and 1 tsp. vanilla extract until combined.  Add the Super Chunky Christmas Cookie mix until well combined.  * Add 1/2 cup chopped cashews if desired.  Scoop into balls and place on baking sheet.  Bake at 350F for 10-12 minutes or until done.  Cool on rack.  Enjoy!

It's that simple.  Cookie Mix + sugar + butter + eggs + vanilla extract!

Quick pic of the finished product
Did I mention that these cute little gifts are quite friendly on the wallet as well?  Well, they are.  I believe my total was about $5ish per jar and I made about 10-12 jar (including all the jars and ingredients which may vary depending on the quality and brands of ingredients you choose to use).  Sorry to those of you reading this that got a jar...at least you know I was being economical!

Until next time!...Which will be soon, I promise!